Practical, step-by-step instructions on how to restore your paver patio and protect the life of your hardscape in order to avoid weeds, stains, and fadeout so you can be the envy of your neighbors.
Introduction to a Paver Patio Restore Project:
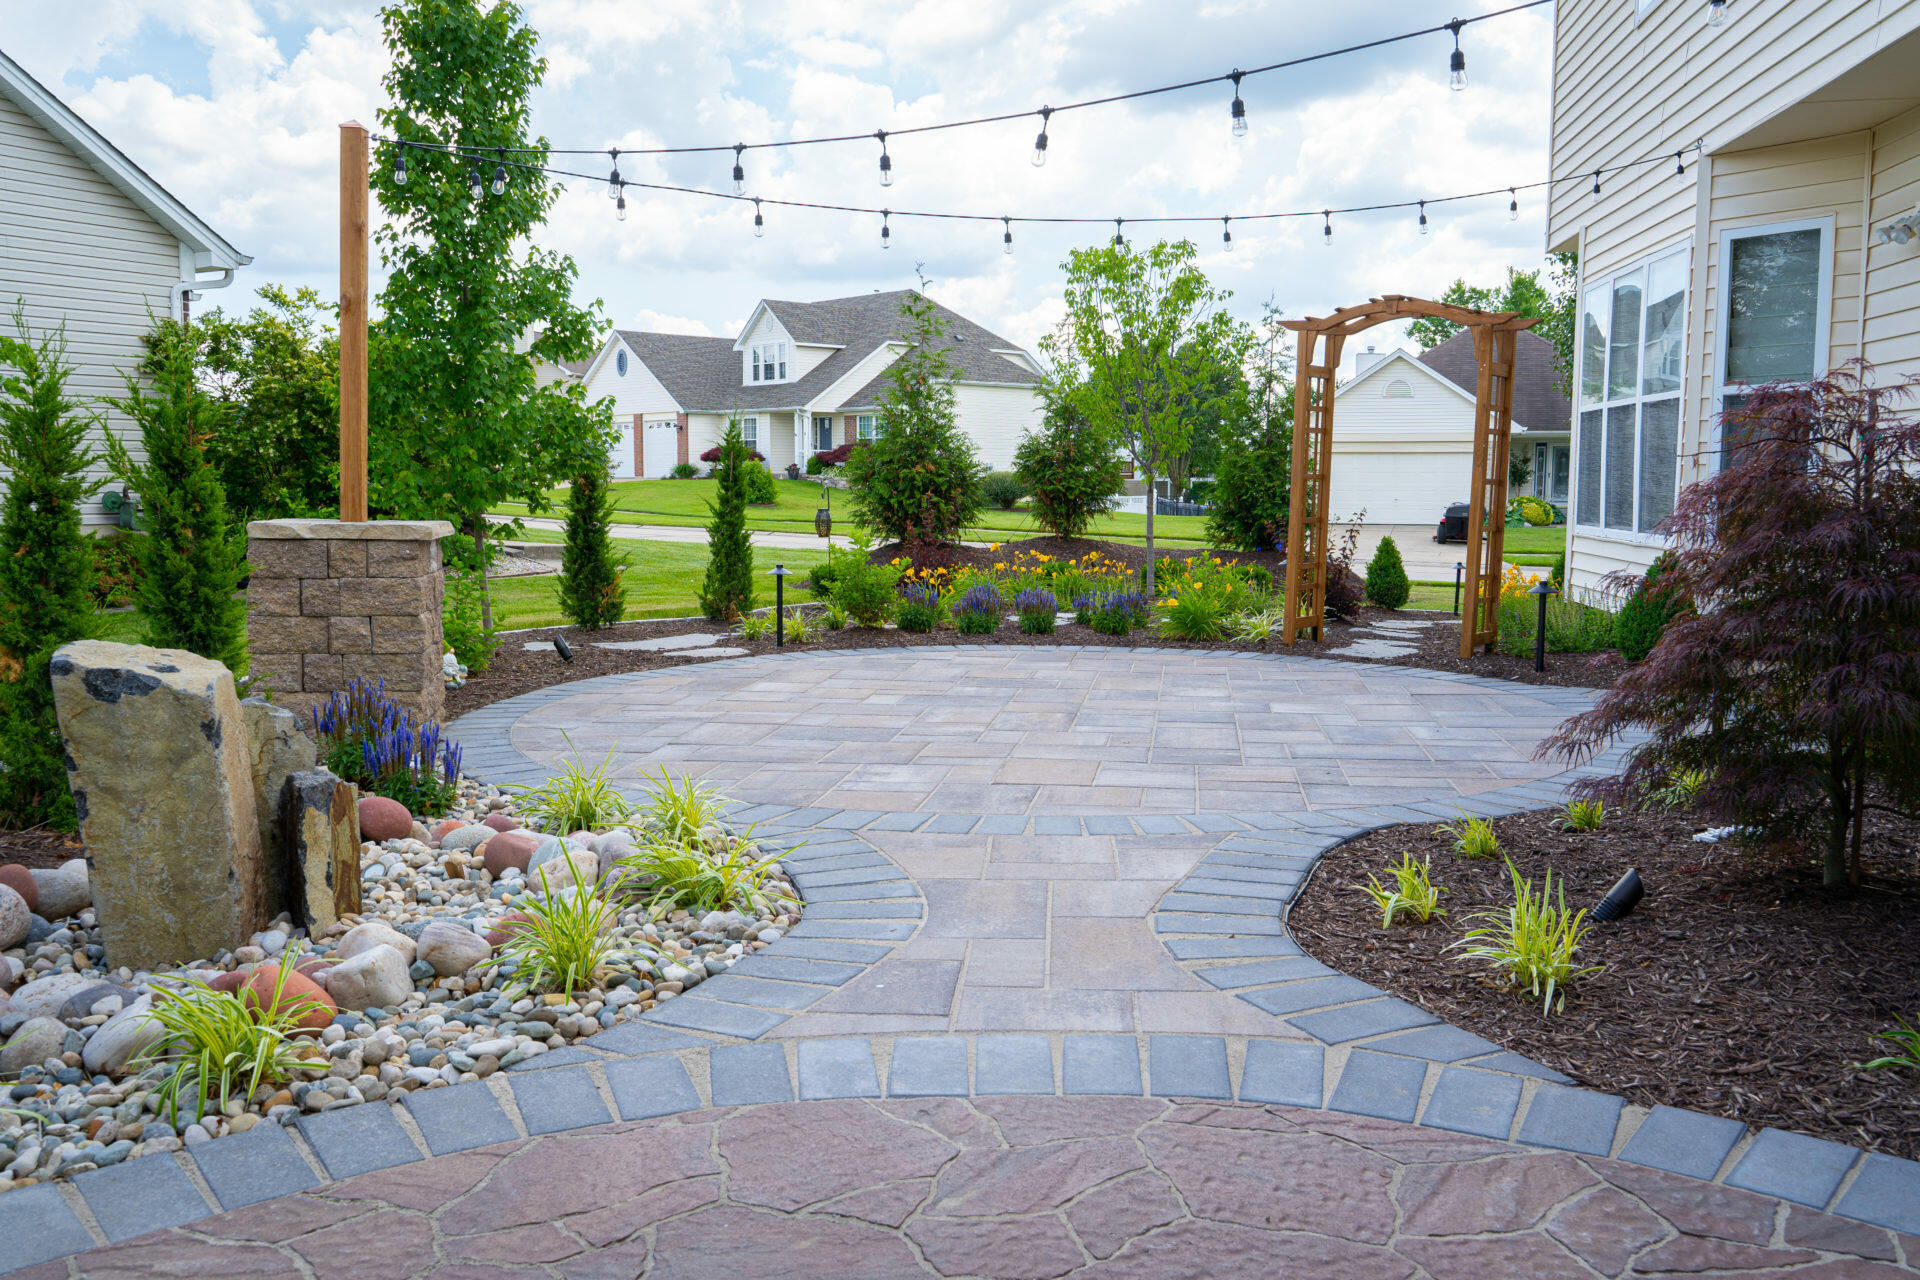
Have you finally had enough of the eyesore of fading pavers and weed overgrowth on your once-welcoming paver patio? The design style is still there, but it’s hidden under the ghastly blemishes of busy schedules and Father Time. We’ll walk you through three practical steps that will restore your pavers and reestablish the beauty of your design style.
If you’re not quite sure restoration is right for you, and you are considering tearing it out and starting fresh, take a look at our cost breakdown for building a brand new paver patio! And research some of the most popular trends in design.
| TIME | COMPLEXITY | COST |
| 3 Days | Intermediate | $1.50 – 2.50 sq. ft. |
Tools Required:
- Pressure Washer
- Putty Knife
- Broom
- Sprayer or Roller (we’ll help you choose which is best for you!)
Materials Required:
- Cleaning Detergent – designed for cleaning brick
- Grease-Cutting Soap (specifically for any oil stains – use only on localized spots)
- Rust-cleaner for any rust stains (use only on localized spots)
- Muriatic Acid or other manufacturer approved solvent for tough stains (Warning! Expert use only on localized spots)
- Polymeric sand
- Sealant (water-based or oil-based)
How to Restore Your Paver Patio:
In this article, we’ll walk you through the steps of restoring your paver patio in order to revive your weathered hardscape. From cleaning off stains, managing weed growth and protecting it from future growth, and restoring the original color of your faded pavers, we promise to guide you through these important steps so your design style on this outdoor retreat reigns supreme!
Step 1:
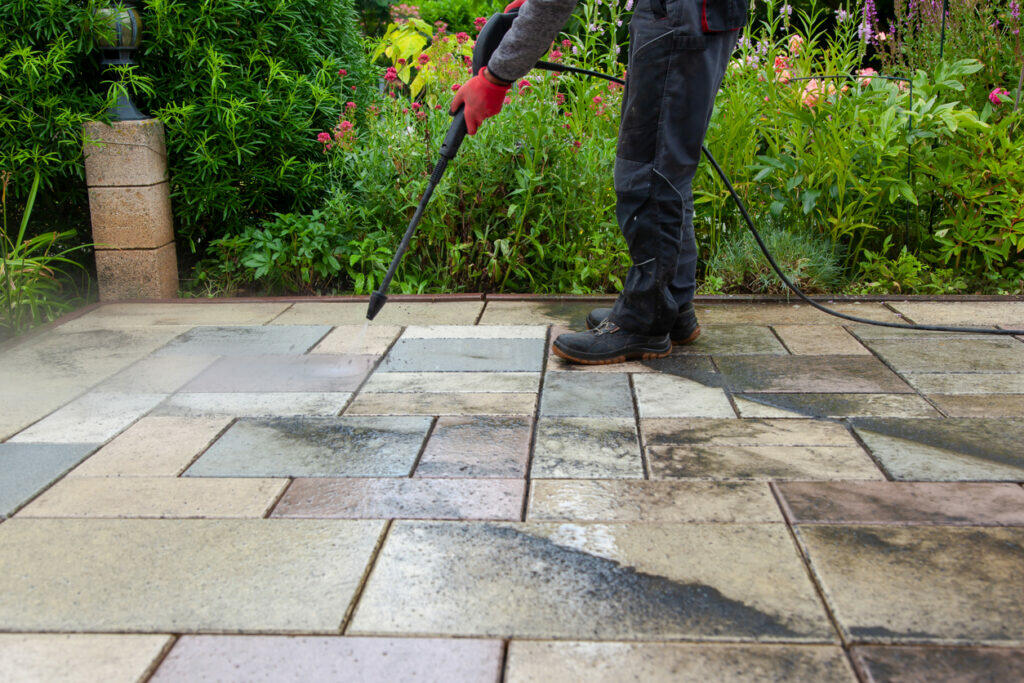
CLEAN the space.
- Remove any furniture and potted plants from the patio.
- Pull any grass or weeds that have grown between pavers.
- Use the pressure washer to spray each section thoroughly. The goal is to remove any loose debris, sand, or stains.
- Be careful! The pressure washer can etch or damage the pavers if you hold the nozzle too close or are inexperienced!
- Utilizing the cleaning detergent, follow instructions on the bottle to apply to patio space, and rinse thoroughly.
- IF patio pavers have rust or oil stains, please follow instructions and apply remover directly to the stain. Rinse thoroughly.
- Using your putty knife, remove any sand between pavers that is cracked, broken, or is no longer adhered to a paver.
- Run the power washer once more to remove excess sand.
- Allow 24-48 hours of drying time before beginning the next step! Sealant will not adhere to the pavers or sand if moisture is present.
Step 2:
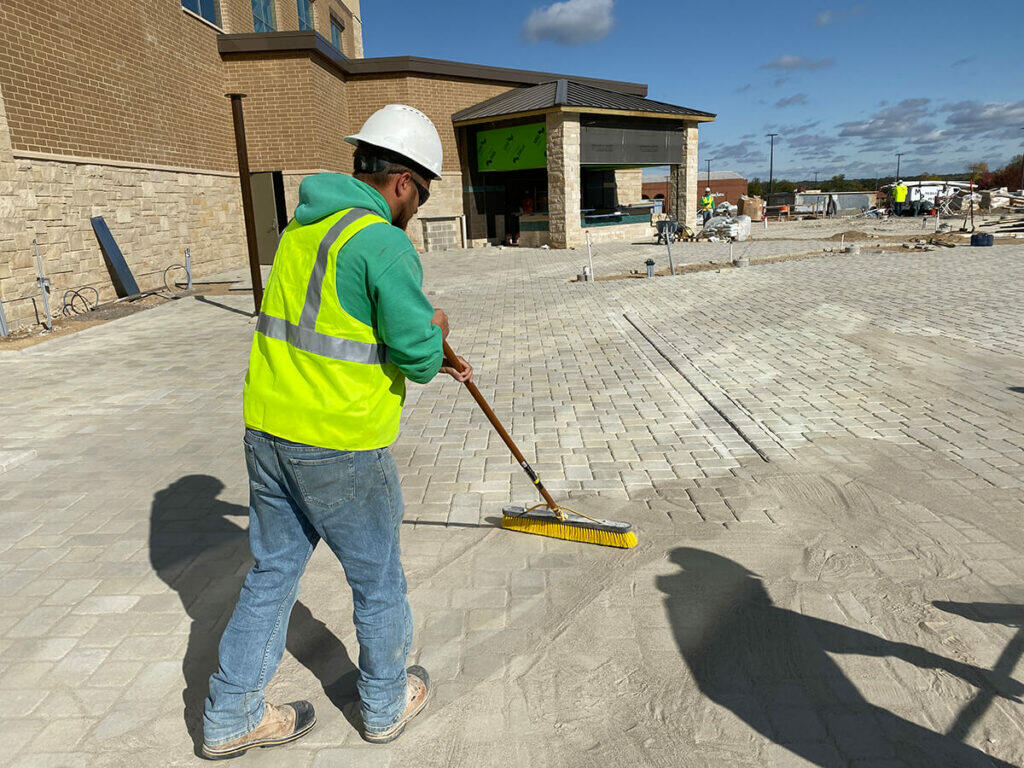
Sweep Techniseal Nexgel polymeric sand into paver joints.
- Prior to beginning this step, it is highly recommended to ensure weather conditions are conducive for sand. Please read instructions on the polymeric sand bag for these details.
- Dry weather with low wind is necessary so check the forecast before starting this step!
- Pour the sand over the entirety of the patio surface.
- With a push broom, remove any excess sand off the surface of the pavers into the joints.
- Be sure to adhere to proper heights in the joint.
- This depends on the paver you have chosen:
- For a smooth paver, polymeric sand should fill the joint and be flush with the paver
- For a paver with depth and variations on top, polymeric sand should sit in the joint about ¼” below the surface of the paver
- This depends on the paver you have chosen:
- We highly recommend renting a plate compactor. This allows for the sand to be properly compacted into the joints.
- Sweep clean the surface of the patio.
- Spray the surface of the patio with your garden hose – just enough to dampen the surface. Allow enough time to dry, and spray once more.
- Avoid traffic of any kind on the patio for 24-48 hours.
Step 3:
SEAL that sucker.

- Sprayer or Roller? Let’s break down what is the best tool for your patio:
- Sprayer = for an even coating that gives a great finish, purchase a pump sprayer at your local hardware store and follow the sealant directions. It’s imperative that you wear a mask, gloves, and protective eyewear when spraying harsh chemicals!
- Roller = for the DIYer that doesn’t like to take risks with spraying chemicals, we see you! You’ll need to purchase an extension for your paint roller, and you’ll pour the sealant into a paint tray. You will need to roll and apply the sealant. While it’s safer for you and the surrounding environment, it’s not as precise as the sprayer.
**Pro Tip! You can combine application methods by spraying a coat of sealant on an area, then lightly roll it to push the sealant into the pores of the concrete pavers and joint material. Although typically reserved for experienced pros, this method often achieves the best finished appearance.
- Water or Oil? Sealants come in both varieties. Let’s decide which one fits your needs:
- Water = Water-based sealants are much more environmentally friendly. The sealant bonds the sand and pavers well on the surface, and it tends to permeate more deeply in the joints and concrete pavers, as compared to the oil sealant. However, you will also need to reapply more frequently in order to keep up with proper protection of your pavers over the years.
- Oil = Oil-based sealants come in high-gloss, low-gloss, or satin finishes, and they do a much better job of bonding things beneath the surface; that means during the seasonal weather changes, there’s less likelihood of shifting and cracks. You also won’t need to reapply sealant as frequently as a water-based sealant. But the big downside is that it’s not environmentally friendly – in fact, you have to tape down and cover all living vegetation surrounding the paver patio AND cover your house if the patio is attached to it. Many states have banned the use of oil-based sealants so check your state guidelines before moving forward with your decision.
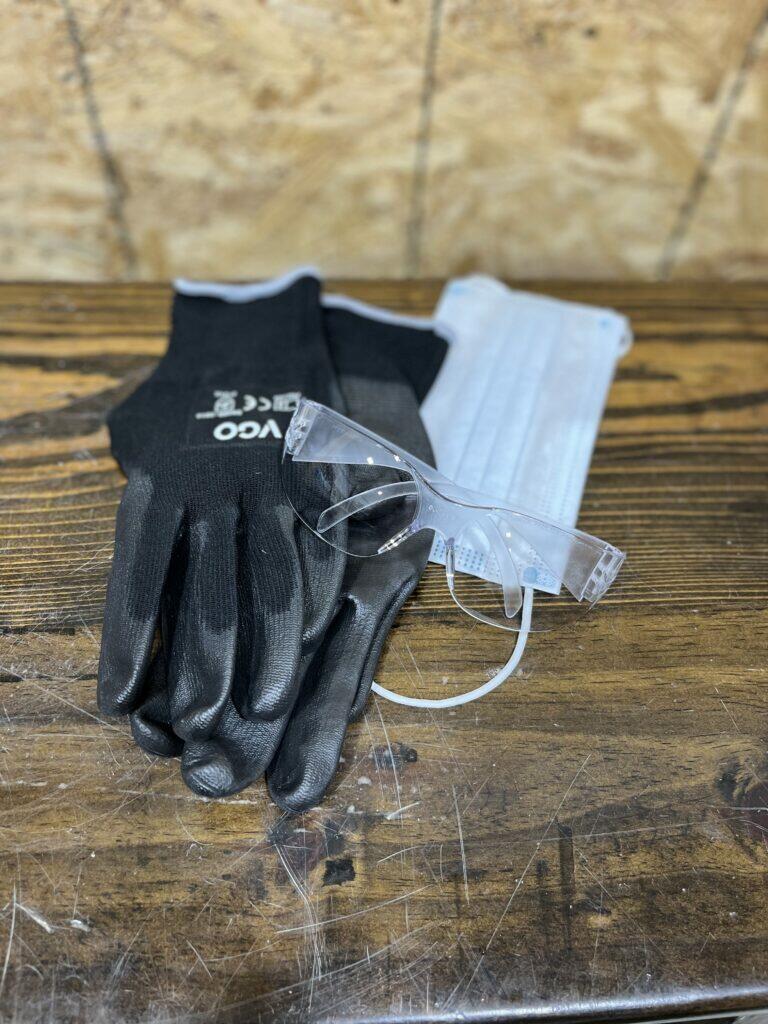
- Now that you have the tool you’ll use and the type of sealant you want, it’s time to protect yourself with a mask, gloves, and protective eyewear.
- Starting with one corner, work methodically in clean, straight lines until you cover the entirety of the patio.
- Overlap each line slightly, so you don’t miss any areas; however, too much overlap will apply too much sealant.
- Allow the sealant to dry and avoid walking on it for 36-48 hours.
- Applying too much sealant on the pavers can cause a murky or milky white appearance that looks cheap and sloppy.
We commend you for doing the research to properly restore your paver patio! As with any project, there will be issues that arise, which means you may need to add more time and energy to this task. Lucky for you, the experts at Elevate Outdoor are trained professionals, and we offer free quotes!